Taking screenshots in Minecraft is easier than you think. In this guide, we’ll show you how to screenshot on Minecraft quickly. Whether you want to capture a stunning sunset or a complex build, our steps will help. You don’t need any special tools. Just follow our straightforward instructions, and you’ll have your screenshot in no time. Ready to learn how to screenshot on Minecraft? Let’s get started and make your gaming moments unforgettable!
How do you take screenshots in Minecraft?
Capturing screenshots in Minecraft is an enjoyable and effortless process. By simply pressing the F2 key, you can swiftly seize memorable moments. These images are automatically saved in your Minecraft folder, making them easily accessible. To locate your screenshots, navigate to the .minecraft/screenshots directory. Don’t forget to display your exceptional creations to your friends! Revel in sharing your distinct Minecraft adventures.
What is the importance of screenshots in Minecraft?
Screenshots play a crucial role in preserving remarkable moments during Minecraft adventures. They provide a seamless method for documenting impressive constructions effortlessly. Players utilize screenshots to showcase remarkable designs with their online friends. The exhibition of unique landscapes and structures nurtures creativity. Moreover, capturing in-game issues in screenshots facilitates troubleshooting. Well-timed screenshots help maintain memories of multiplayer sessions. Regularly taking screenshots promotes ongoing improvement in building techniques. By visually displaying your creative progress, you can inspire and encourage fellow players.
Scenarios where taking a screenshot might be useful
When you feel proud of your hard work, make sure to capture your incredible builds. Share the breathtaking landscapes with friends to ignite their creativity. Preserve your Redstone mechanism setups for future reference and enhancements. Record multiplayer sessions to cherish the fun times spent with friends. Help developers by reporting bugs with clear visual evidence.
Methods for Taking Screenshots on Different Platforms
PC (Windows)
Using the F2 Key: Step-by-step Instructions
- Launch Minecraft: Open your Minecraft game and get to the moment you want to detention.
- Press the F2 Key: To capture a screenshot of your current view, simply tap the F2 key on your keyboard.
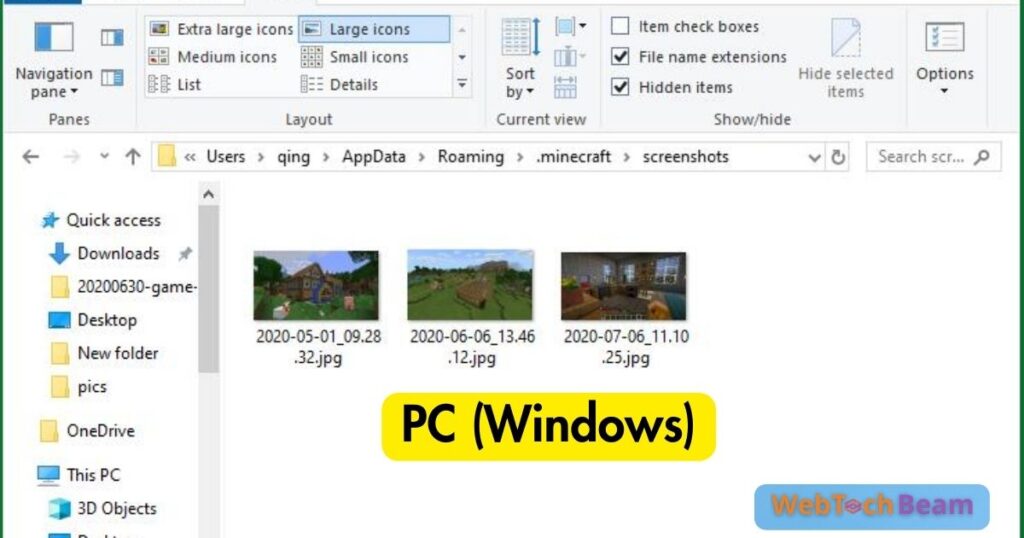
- Locate Your Screenshot: Go to your .minecraft/screenshots directory. It’s in the “AppData” folder on your computer.
- Share and Enjoy: Now, you can share your screenshot with friends or on social media.
Using the Snipping Tool: Step-by-step Instructions
- Open Minecraft: Start your game and go to the scene you wish to capture.
- Launch the Snipping Tool: Press the Windows Key, type “Snipping Tool,” and open it from the list of results.
- Select New Snip: Click on “New,” then quickly drag your mouse over the screen to capture the desired area.
- Save Your Snip: Save your screenshot in a folder of your choice by clicking on the save icon.
Using Third-party Software
If you ever find yourself in need of advanced features for your screenshots, here are some recommended tools to consider.
Recommended Tools and Brief Guide
- Lightshot: A lightweight tool for easy and quick screenshots. Simply press the PrtScn key, select your area, and save or share the image.
- Gyazo: Capture, share, and save screenshots with just one click. Gyazo offers cloud storage and easy sharing options.
- OBS Studio: While mainly a recording tool, OBS Studio can also capture screenshots of your Minecraft gameplay with high quality.
By employing these techniques, you can enhance your Minecraft experience by effectively capturing, storing, and sharing screenshots.
Mac
Using Command + Shift + 4: Step-by-step Instructions
- Open Minecraft: Start your Minecraft game and go to the scene you want to capture.
- Press Command + Shift + 4: Press these keys to activate the screenshot function on your Mac.
- Select the Area to Capture: Click and drag the crosshair to select the screenshot area.
- Release the Mouse Button: When you’re ready, let go to take the screenshot.
- Find Your Screenshot: Your screenshot will automatically save on your desktop, titled with the date and time.
- Share Your Screenshot: You can now easily share your screenshot with friends or post it online.
Using Built-in Minecraft Functions: Step-by-step Instructions
- Press the F2 Key: In Minecraft, press F2 to capture your current screen instantly.
- Check for Confirmation: Look for a confirmation message in the bottom left corner.
- Find Your Screenshot: Go to the .minecraft/screenshots folder to locate your capture.
- Rename and Organize: Rename your screenshot for easy identification and organization.
- Share with Friends: Share your screenshots through email, social media, or Minecraft forums.
Consoles (PlayStation, Xbox, Nintendo Switch)
Capturing your favorite Minecraft moments is made easy and efficient with the simple use of the screenshot function on your console. Follow the detailed steps provided for each console, and you’ll be able to capture those special moments effortlessly.
PlayStation
- Bring Up the Sharing Menu: Press the “Share” button on your controller.
- Select “Screenshot”: Choose “Screenshot” from the sharing menu options.
- Save Your Image: Confirm to save the image to your gallery.
- Find Your Screenshot: Navigate to the “Capture Gallery” to locate your screenshot.
- Share Your Screenshot: Share directly from the console or transfer to a USB drive.
Xbox
- Press the Xbox Button: Tap the large Xbox button on your controller.
- Open Capture Options: Navigate to the “Capture & Share” menu.
- Select “Take a Screenshot”: Choose this option to capture the current screen.
- Find Your Screenshot: Go to the “Recent Captures” section in your Profile.
- Share Your Capture: Directly share or save to an external storage device.
Nintendo Switch
- Press the Capture Button: Hit the square-shaped button on the left Joy-Con.
- Instant Capture: Screen captures instantly and saves to the album.
- Navigate to Album: Open the album from the Home menu.
- Locate Your Screenshot: Find and view your screenshot in the album.
- Share on Social Media: Use the console’s sharing functions to post online or transfer via SD card.
Mobile Devices (iOS, Android)
Taking screenshots on iOS or Android using device-specific methods is an easy and fast process.
iOS: Step-by-step Guide
- Open Minecraft on your iOS device: Get to the screen you want to capture.
- Press the Side and Volume Up buttons together. This takes a screenshot.
- Release both buttons quickly: The screen flashes, and your screenshot is saved.
- Find the screenshot in your Photos app: Screenshots are saved in a dedicated folder.
- Edit and share from the Photos app: You can crop, annotate, and share screenshots easily.
Android: Step-by-step Guide
- Open Minecraft on your Android device: Make sure the desired screen is displayed.
- Press the Power and Volume Down buttons together. Hold them until the screen flashes.
- Release the buttons immediately: Your screenshot will be captured and saved.
- Find the screenshot in your Gallery app: Screenshots are stored in a dedicated folder.
- Edit and share directly from the Gallery: Quickly access editing tools and sharing options.
How to Take a Screenshot in Minecraft Windows 10 Edition
Step 1: Using the In-Game Screenshot Function
Press the F2 Key
Detailed instructions for capturing screenshots by utilizing the built-in function within the game.
- Press the F2 Key: To capture your screen instantly, simply press the F2 key in Minecraft.
- Look for Confirmation: A confirmation message will appear in the bottom left corner.
Look for Confirmation
The purpose of the confirmation message displayed on the screen is to provide an explanation or clarification regarding the information or action that has just been confirmed.
- Appear at Bottom Left Corner: After pressing F2, watch for a message in the bottom left.
- Quick Confirmation: This message confirms your screenshot has been taken successfully.
Step 2: Using the Windows Game Bar
Open the Windows Game Bar
To open the Game Bar, follow these steps:
1. Press and hold the Windows key (Win) on your keyboard.
2. While holding the Windows key, press the G key.
3. The Game Bar should now appear on your screen.
- Press Win + G Together: Open the Windows Game Bar by pressing Win Key and G simultaneously.
Take a Screenshot
Instructions for choosing the screenshot button in the Game Bar:
- Click the Camera Icon: In the Game Bar, click the camera icon to take a screenshot.
Find Your Screenshot
Here is where you can find your screenshot in the “Captures” folder:
- Open the Captures Folder: Navigate to the “Videos” directory and find the “Captures” folder.
Step 3: Using the Snipping Tool
Open the Snipping Tool
To launch the Snipping Tool from the Start menu, follow these steps:
- Open Start Menu: Click on the Start menu and type “Snipping Tool” in the search bar.
- Click on Snipping Tool: Select the Snipping Tool application to open it.
Select Screenshot Area
What steps should be followed to choose the area for capturing?
- Drag to Select Area: Click and drag to select the area you want to capture on your screen.
Save Your Screenshot
Please follow these steps to save the captured image to your preferred location:
- Save the Image: Click “File” and then “Save As” to save your captured image.
Step 4: Using Third-Party Software
Select a Third-Party Tool
Overview of recommended third-party screenshot tools:
- Choose a Trusted Tool: Select a reliable tool like Lightshot or Greenshot for taking screenshots.
Capture the Screenshot
Detailed instructions designed specifically for commonly used tools such as Lightshot or Greenshot, organized in a sequential manner.
- Activate the Tool: Open your chosen tool and press the capture shortcut key.
Edit and Save
Here are some suggestions for utilizing editing features before saving your work:
- Edit Before Saving: Use built-in editing features to annotate or highlight parts of your screenshot.
- Save the Edited Image: Click save to store your edited screenshot in your desired folder.
Locating and Managing Your Screenshots
PC and Mac
Tips for Organizing and Backing Up Screenshots
Finding your Minecraft screenshots is simple once you know where to look. On a PC, open the “Windows Explorer” and type “%appdata%.minecraftscreenshots” in the address bar. This will take you directly to the screenshots folder. On a Mac, open “Finder” and press “Command + Shift + G.” Type “~/Library/Application Support/Minecraft/screenshots” into the search field and press Enter.
To maintain a well-organized collection of screenshots, consider creating subfolders based on either the date or event. This approach facilitates easy access to your cherished Minecraft memories. Additionally, it is wise to back up your screenshots folder by copying it to an external drive. For added security, utilize cloud storage services such as Google Drive or Dropbox. By regularly backing up your screenshots, you can ensure that your valuable memories are never lost.
Consoles
Accessing Screenshots from the Console’s Media Gallery
Accessing your screenshots from any console’s media gallery is a straightforward process. For PlayStation, simply open the “Capture Gallery” option. On Xbox, navigate to the “Recent Captures” section. And on Nintendo Switch, open the “Album” from the Home menu. By following these steps, you can easily locate your saved screenshots.
Sharing and Transferring Screenshots to Other Devices
Easily and enjoyably share your screenshots through social media platforms. If you own a PlayStation, simply transfer images using a USB drive. For Xbox users, save them to an external device to facilitate sharing. Nintendo Switch owners can transfer pictures to other devices using an SD card. Remember to regularly back up your cherished screenshots.
Mobile Devices
It’s a simple process to find screenshots on your device. First, go to your photo gallery and find the folder labeled “Screenshots.” Your screenshots are saved automatically and can be easily accessed there. Next, open the gallery app and search for the specific album containing your screenshots. If you want to keep your images organized and easily locatable, you can create new folders to manage your screenshots.
To share, utilize the app’s pre-installed sharing features. Easily share screenshots from the gallery to social media. For quick sharing with friends, employ email or messaging apps. Keep your gallery organized by regularly tidying up to avoid clutter. Safeguard your important screenshots by backing them up to cloud storage. This guarantees that you never lose your precious moments. Have a great time capturing and sharing your Minecraft adventures!
Tips and Tricks
Capturing High-Quality Screenshots
- To ensure clear and undistracted visuals in your shots, it is recommended to begin with a clean screen. Additionally, for the best resolution and detail, it is advised to adjust the game settings to their highest quality.
Taking Staged or Action Shots
- To capture captivating scenes and moments, it’s crucial to plan your shots carefully. When it comes to action shots, timing is everything. Stay prepared to press the capture button precisely during the peak action.
Editing Screenshots for Better Presentation
- You can utilize the editing tools provided to crop out any unnecessary parts of your screenshot. Additionally, enhance the colors and contrast to make the image visually appealing and vibrant.
Conclusion
In summary, we covered the various approaches to capturing and organizing Minecraft screenshots across different platforms including PCs, Macs, consoles, and mobile devices. These straightforward techniques guarantee that you won’t overlook capturing your cherished Minecraft memories. Categorize your screenshots into folders based on dates or specific events for better organization. Additionally, consider utilizing cloud storage or external drives as reliable backup options for preserving your valuable images.
Don’t forget to share your Minecraft adventures on social media! The community loves to see all the creative and exciting moments you encounter. Use these helpful tips to easily capture and share breathtaking screenshots. Encourage your friends to showcase their own Minecraft experiences too. Enjoy taking screenshots and keep sharing your incredible Minecraft worlds!
FAQ’s
How do you make a Minecraft screenshot?
While playing the game, press the F2 key to capture a screenshot in Minecraft.
Where do Minecraft F2 screenshots go?
In Minecraft, F2 screenshots are stored in the “Screenshots” folder located in the game directory.
What does F4 do in Minecraft?
In Minecraft, the debug screen modes can be cycled through by pressing the F4 key.
How to screenshot Minecraft without menu?
In order to capture a Minecraft screenshot without the menu, simply press F1 followed by F2 after hiding the HUD.
How do you use F2 in Minecraft?
To capture the current game screen as an image in Minecraft, simply press F2.
How To Screenshot On Minecraft (webtechbeam.com)